New Year — New Blog
A student asked me to help set up a simple, static website. He wanted to learn a little about AWS, and at the same time stay within his budget (which was basically $0).
Overview
So we came up with the following:
- Leverage AWS S3 buckets’ Website hosting. This would keep costs down, and since the content is fairly static, there’s no need to implement a compute-heavy back-end, so no need to utilize or pay for anything more than a static bucket.
- Leverage automation and enforce ‘everything as code’. We did not want to have to log into anything to set up any development environments. It also meant that that any code promotion must be automated.
- Leverage containerization where possible. This is related to the previous bullet, but in addition to defining any development environments as code, it also means that any dev environments are ephemeral and can be destroyed and re-created.
- Not have to write a single line of HTML, JavaScript or CSS to implement the site.
Proposed Solution
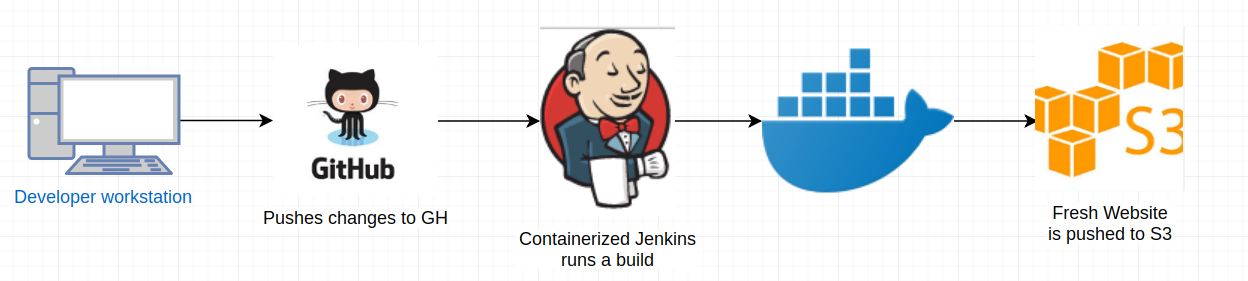
The following describes what we came up with. The drawing represents the flow and technologies used, while more details follow.
To eliminate the need for coding any HTML, JavaScript or CSS by hand, we decided to use Jekyll. This allows you to write websites in plain text, such as Markdown, and have it translated into HTML.
But how to build and deploy?
Jekyll is written in Ruby, and the student didn’t have a great place to install the Ruby development environment. Additionally, we didn’t want to be in the business of maintaining a development environment and also be responsible for doing the builds/deployments up to S3.
Docker and Jenkins to the rescue
Docker is a natural fit for these situations. It allows you to quickly spin up a development environment and install various tools, etc, without making permanent changes to your primary workstation. Additionally, we wanted to use Jenkins to perform builds and deployments so we didn’t have to do this manually.
We started off using the Jenkins/Jenkins docker image found here: https://hub.docker.com/r/jenkins/jenkins. This image, while containing a fully functional, update to date version of Jenkins, didn’t have any of the build tools for Jekyll. So after a few tweaks to a new Dockerfile, we extended the base Jenkins image and added the necessary tools and dependencies to provide our Dockerized Jenkins with all it needed to do Jekyll builds. Below is the Dockerfile that we wound up with:
[bash]
FROM jenkins/jenkins:lts
# if we want to install via apt
USER root
RUN apt-get update && apt-get install -y ruby ruby-dev gcc g++ make vim zlib1g-dev
RUN gem install bundler jekyll jekyll-feed jekyll-seo-tag:2.5.0 minima:2.5.0 jekyll-remote-theme alembic-jekyll-theme

# drop back to the regular jenkins user - good practice
USER jenkins
[/bash]
Running Jenkins inside Docker this way ensures that we’ll always get the latest version of our development and deployment stack, simply by pulling and restarting the image. It also ensures that we can instantly re-create our environment, rather than worry about manually applying patches, updates etc.
The code for this image is available here: https://github.com/danscarf/jenkins-jekyll.
Now on to the Website code
We wanted the website to be store in human-friendly text. This means that the author of the website could more easily focus on content writing rather than learning several new languages (HTML, Javascript and CSS). To provide a simple way to get started, I bootstrapped another GitHub repo that provides the bare minimum content for a static, personal website/blog.
Here’s the link to the repo: https://github.com/danscarf/jekyll-blog
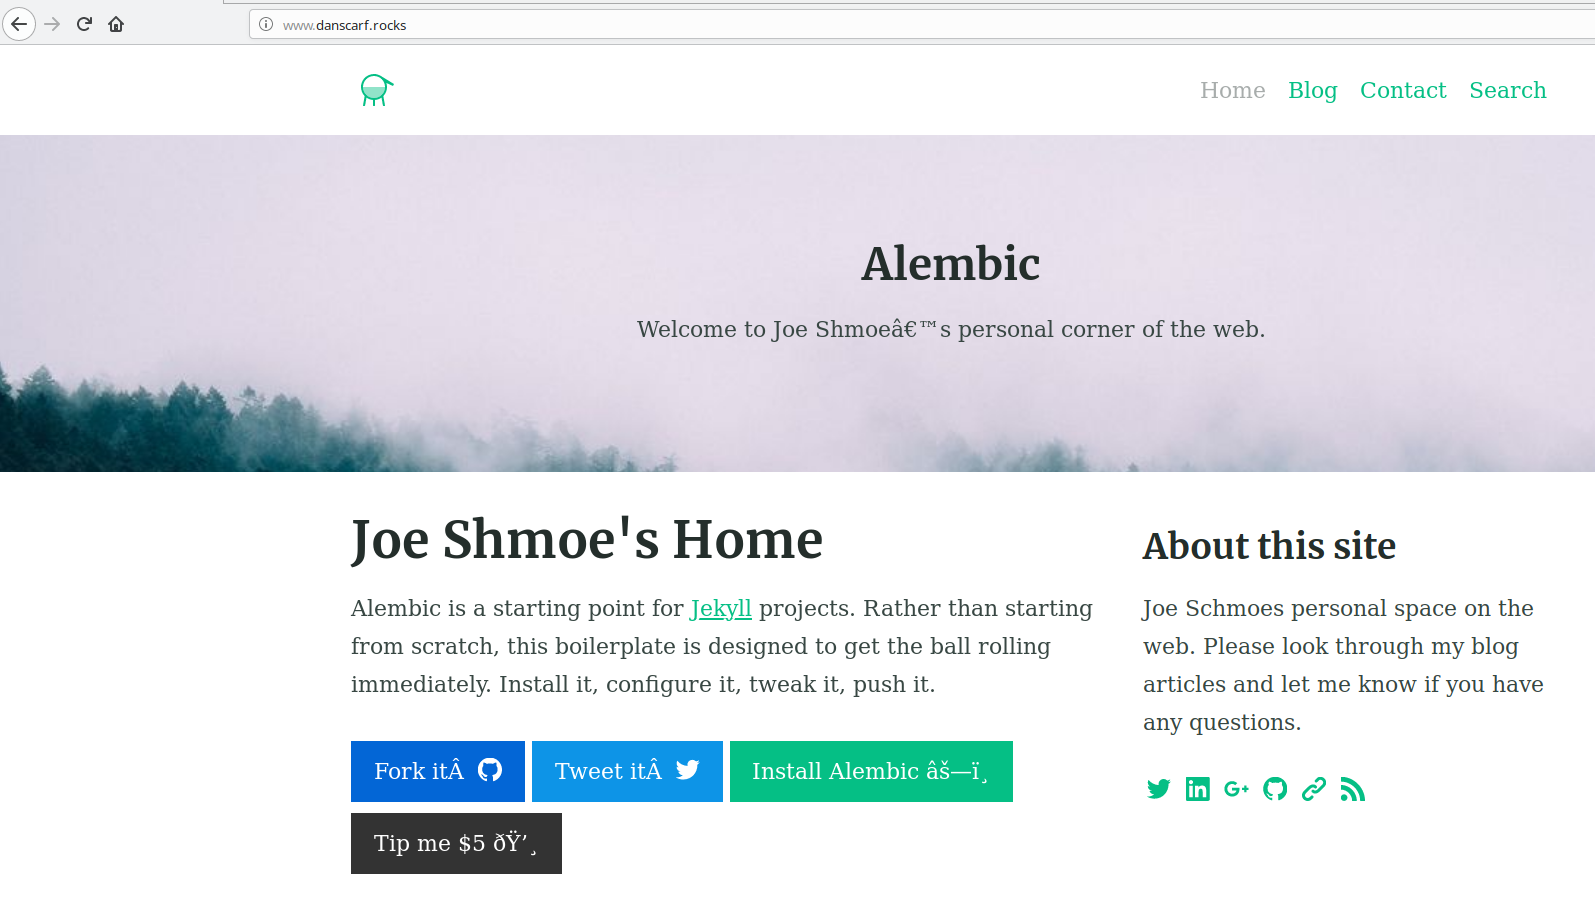
Note that this repository doesn’t contain directly contain any styling — It focuses very strongly on the layout and the content. The ‘theme’ for the site is called Alembic, and if found at this link: https://jekyllthemes.io/theme/alembic.
The theme available as a Ruby Gem, and is applied to the site at compile time during the Jenkins automated build process, which is discussed below.
So how does it all tie together?
A Jenkinsfile is the magic that glues all the automation together. Let’s take a look at it:
[java]
pipeline {
agent any
stages {
stage('Checkout') {
steps {
echo 'Code checked out. Build starting.'
}
}
stage('Build') {
steps {
sh 'bundle install -V'
sh 'bundle exec jekyll build -V'
}
}
stage('Publish to S3') {
steps {
echo 'Publishing to S3'
script {
s3Upload consoleLogLevel: 'INFO', dontWaitForConcurrentBuildCompletion: false, entries: [[bucket: '******', excludedFile: '**Jenkinsfile**', flatten: false, gzipFiles: false, keepForever: false, managedArtifacts: false, noUploadOnFailure: false, selectedRegion: 'us-east-1', showDirectlyInBrowser: false, sourceFile: '_site/**', storageClass: 'STANDARD', uploadFromSlave: false, useServerSideEncryption: false]], pluginFailureResultConstraint: 'FAILURE', profileName: '******', userMetadata: []
}
}
}
}
}
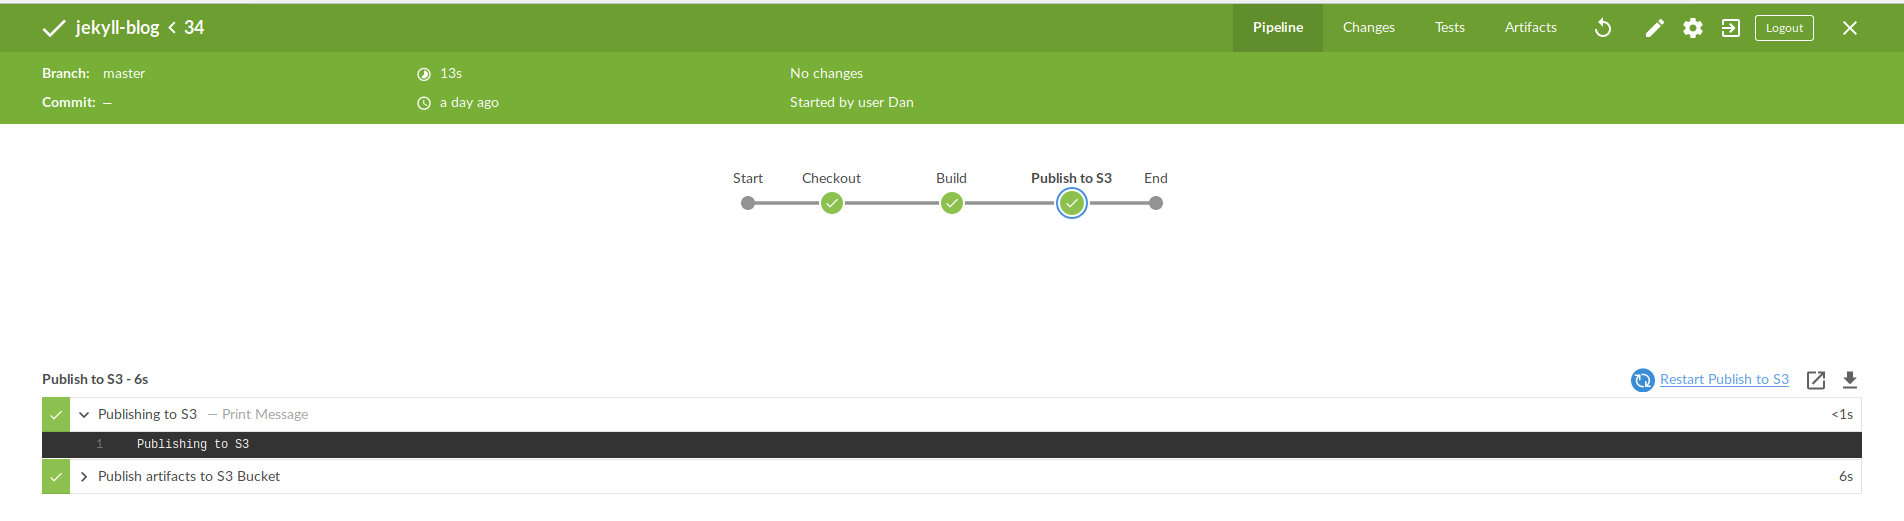
[/java]The above is a minimal Jenkins Pipeline that pulls the Website markdown code from GitHub, bundles the latest version of the Alembic theme at build time, runs the Jekyll Build command, then if all goes well pushes the newest copy of the website up to the designated S3 bucket.
This is what it looks like in Jenkins’ fancy new Blue Ocean UI:
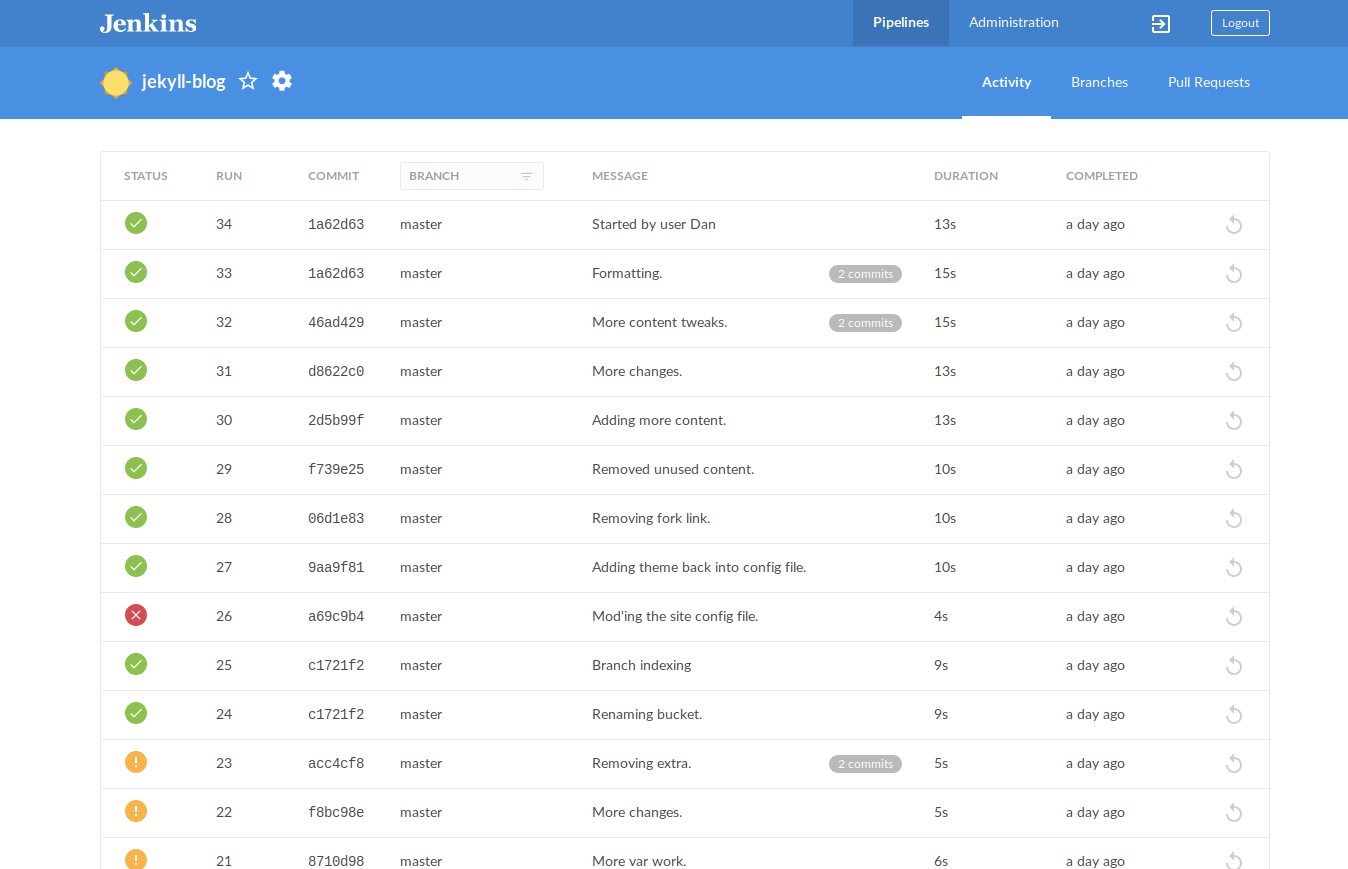
When all is said and done, we had a fully automated build/deployment pipeline wherein plain text content goes in, and a website is automatically updated:
Conclusion
We ended up with a very low maintenance, highly automated solution that allows someone with comparatively little web development skills to build and maintain their own static website in the AWS cloud for almost no cost. Here are the links to the code:
- GitHub Repo for the Docker Jenkins image: https://github.com/danscarf/jenkins-jekyll
- GitHub Repo for the Jekyll website content: https://github.com/danscarf/jekyll-blog